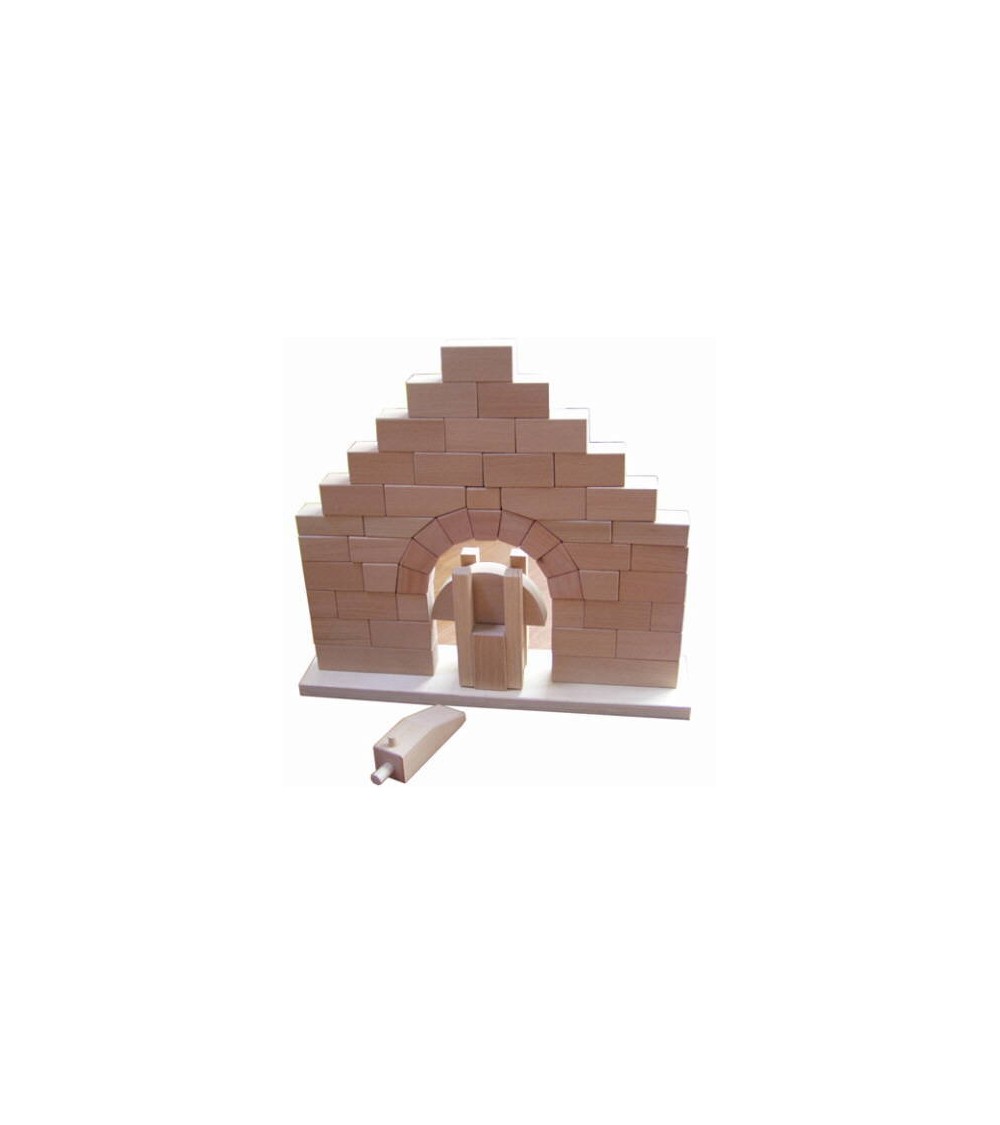
Roman Bridge
Roman bridge, large, 35-piece set a cosmic Montessori material on architecture
wooden
The Roman Bridge is the only Montessori material that deals with architecture and statics. Children of all grades learn how to use traditional building elements exactly and also train concentration and fine motor skills. Precise work to the end is immediately rewarded: The bridge only gains its astonishing stability when the last stone is inserted!
Use, advantages, areas of application for this Montessori material:
-
- Construction of the arch construction exactly according to the instructions, also in group work
-
- Enduring failure, looking for your own mistakes, keeping an eye on the goal
-
- Montessori material for children from 4 years
-
- Gather basic architectural experience
Scope:
1 baseboard with parted side parts (for support), wood, approx. 25 x 10 cm
35 building blocks, wood
1 support for assembly (3 parts), wooden
bridge built up: approx. 25 x 10 x 27 cm
Instructions for the Roman Bridge
The adult places the baseboard of the Roman Bridge on the table in front of him. Now assemble the support by placing the support on the table with the wooden block facing down and the four columns facing up. The semicircle is placed in the column with the curve facing up. The wedge is pushed between the semicircle and the support bracket. The wedge has two buttons - one on the side and one on the top that slopes backwards. The wedge is pushed between the semicircle and the support bracket in such a way that the button on the top rests directly on the semicircle (on one of the large side surfaces of the semicircle).
Now the stones are pre-sorted according to size and shape.
To make the assembly easier and for better orientation, the article picture is used initially. It is placed next to the baseboard.
Seven stones are already firmly attached to each side of the baseboard. Starting with these stones, the rows are now completed. The easiest way to do this is to first build the archway over the support post and fill in the gaps with the appropriate stones. The archway itself consists of nine trapezoidal wooden blocks. The smallest rectangular block lies above the fifth block (in the middle of the arch). To the left and right of it are the large blocks, which are bevelled at the end. To the left or right of these bevelled blocks are large rectangular blocks. The remaining large rectangular blocks are arranged in the form of a pyramid in the rows above.
When all the stones are installed, the support bracket is removed. To do this, the wedge is carefully pulled out between the semicircle and the support bracket. Then the support bracket with the semicircle can be removed. The Roman Bridge is set up correctly if no stone falls down after removing the support.
Variations:
If the child is more experienced, they can build the bridge without the help of the article picture.

