Trinomial Cube
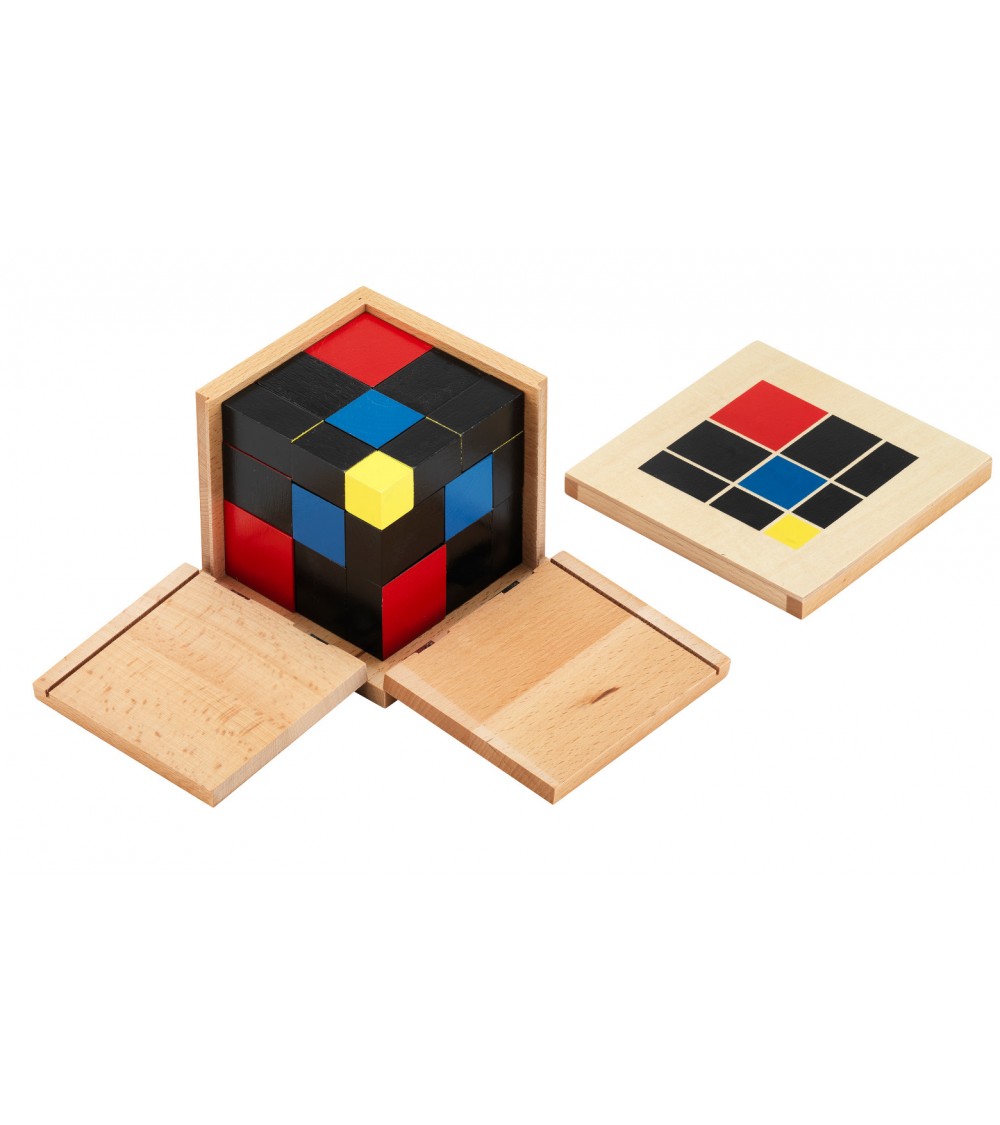
Trinomial cube, Montessori's trinomial cube, complete, 29-piece set
The aim and handling of this cube correspond to the binomial cube. As an additional difficulty, it is tripartite (trinom).
Application, advantages, areas of application for this Montessori material:
-
- Preliminary stage of algebra
-
- Promotion of spatial understanding
-
- Build elements in three dimensions
-
- Extension of the binomial cube
-
- Montessori material for children from 4 years
Scope of the Montessori mathematics material:
27 colored individual blocks, wood
1 hinged frame in the shape of a cube, wood
1 cover for the frame, wood
approx. 10 x 10 x 10 cm in total
Instructions for the trinomial dice
The adult removes the lid of the wooden box and folds open the side panels.
Now all the upper cube elements are first removed and set aside, then the middle and lower ones.
To make it easier to assemble, the cubes or prisms are sorted according to color and, above all, size (lower level of the trinomial cube: large prisms, middle level: medium-sized prisms, upper level: small prisms) and the lid of the wooden box. The side faces of the box remain open for the construction of the trinomial cube.
The correct arrangement is marked on the lid. The adult begins with the red cube (cube). This is placed in the corner of the wooden box. A prism from the red-black prisms is selected and placed in such a way that the red side surface rests against the side surface of the cube; red to red. The other red and black prism is placed on the other side of the red cube (there are 4 red and black prisms for the lower level - 2 wider and 2 narrower - the wider prisms must be placed on the red cube). Now two black sides can be seen from the front (in the gap).
The black-blue prism is now placed in this gap (black on black; thus with the blue surface facing up or down). Now the narrower black-red prisms are placed red on red on the red surfaces of the first prisms. The black prisms are placed on the left and right in the gaps between the black-red and black-blue prisms. The black and yellow prism is inserted into the gap that remains, with the yellow surface facing up or down. Now the first level of the trinomial cube is completed.
The first level is now the template for the second level. The thicker red-black prism is placed in the corner of the box with the red side over the red cube. The black-blue prisms are placed on the left or right of the red-black corner prism (again color on color, here black on black). The blue cube is inserted into the remaining gap. The black prisms are placed on the black side surfaces of the black-blue prisms. The black and blue prisms come between the blue cube and the black prism. The tip forms the black-yellow prism with black on black, yellow on yellow. Now the second level of the trinomial cube is ready.
The last level begins again with the black and red prism in the corner, next to it the black prisms. The black and blue prism goes into the gap. The outer row begins on the left and right of the black prism with the black-yellow prism, in front of it the shorter black-yellow prism. Finally, the yellow cube is used.
You can now compare whether the pattern of the finished trinomial cube matches the drawing on the lid.


